Dive Migration
This tutorial will guide you through the steps of migrating your dives from an Oceanic+ account that has been created with Sign in with Apple to and Oceanic+ account that is based on email/password login.
The easy way
In case, you used your Apple ID email during Oceanic+ account creation and did not let Apple hide your email address, you can do the following to migrate your account to an email/password based Oceanic+ account:
- Start Oceanic+ app
- Log out of your account (you can do that under Settings–>Account)
- Press the SIGN IN button
- Press the SIGN IN WITH EMAIL button
- Press Forgot password? link
- Enter your Apple ID Email and press NEXT button
- Go to your email to and press the password reset link to reset (actually set for first time)
- You’re done.
If you have chosen for Apple to hide your Apple ID email from Oceanic+, you have to continue with this tutorial below.
Prerequisites
As it is technically not possible for Dive Converter to log you in with Sign in with Apple to your Oceanic+ account, you will need to grab your so-called refresh token with the app HTTP Catcher which is an excellent tool to log the communication of your iPhone and the internet.
Setup of HTTP Catcher
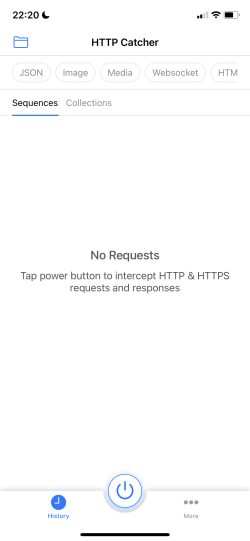
Start HTTP Catcher. You will get to the following screen.
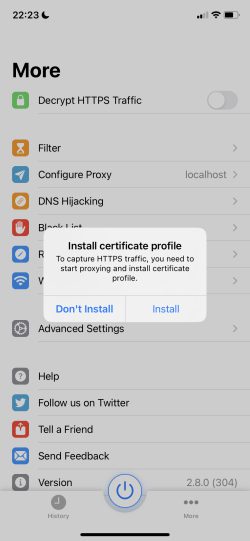
Tap on the More button and enable the option Decrypt HTTPS Traffic which will bring up the shown dialog. Here you press the Install button.
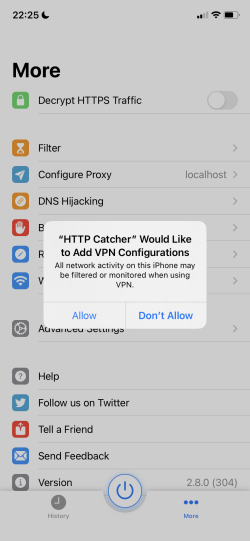
HTTP Catcher will now ask you if you would like to add a VPN configuration. This will allow HTTP Catcher to monitor all network activity on your iPhone.
Press Allow.
HTTP Catcher will now open that VPN configuration in your iPhone Settings. You will have to enter your iPhone passcode to allow the installation.
Then HTTP Catcher returns to the More page.
Enable again the Decrypt HTTPS Traffic option. Press again the Install button.
HTTP Catcher will open Safari and will ask you if you want to allow the website (local temporary web server of HTTP Catcher) to download a configuration profile. Please press Allow.
You may now be asked on which device you want to install it: Choose iPhone. You will then get a confirmation that the profile has been downloaded.
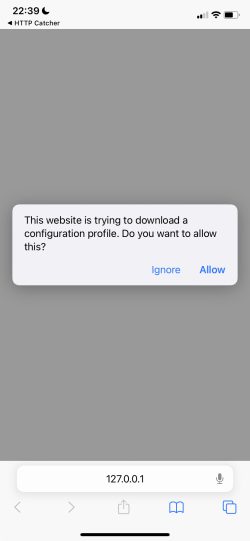
Now go to your iPhone Settings app. Here you go to General > VPN & Device Management.
Here you tap on HTTP Catcher CA and press the Install button.
You have to confirm this by entering your iPhone passcode again.
You get a warning displayed and press again the Install button.
Now go to General > About > Certificate Trust Settings in your iPhone Settings.
Here you enable the HTTP Catcher CA certificate.
A Root Certificate warning will be displayed. Press Continue.
Now you are ready to go.
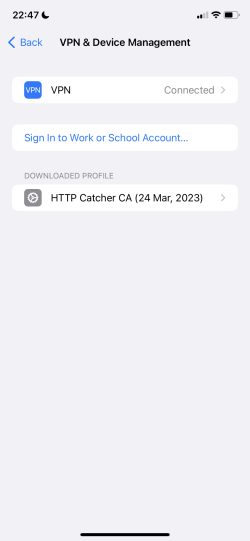
Grab your Oceanic+ Refresh Token
Start HTTP Catcher and press the on/off switch at the bottom middle of the app screen. This will start the logging of the traffic between your iPhone and the internet.
Next step is to start Oceanic+ on your iPhone – we assume that you are still logged into your account that got created with Sign in with Apple.
Make sure that it’s a fresh start of the Oceanic+ app because it will then refresh its access token which will allow the app to log in to your account at the Oceanic+ server .
Now go back to HTTP Catcher and and stop the loging by pressing the button in the bottom of the screen again.
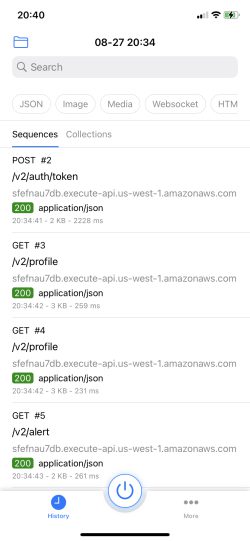
You have to look for the entry that you see in the picture accessing /v2/auth/token. All other entries are irrelevant for us. If you cannot find it, start over by first killing Oceanic+, then starting the network traffic logging in HTTP Catcher, starting Oceanic+, returning to HTTP Catcher and finding the required entry.
Tap on the /v2/auth/token entry and press the Parameter tab.
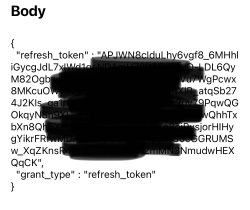
It will show you the refresh token in the Body as shown in the picture (I made my token partially invisible here). Please select the full token excluding the quotation marks and copy it to the pasteboard. In the example in the picture it starts with APJWN and ends with QqCK.
Store this token somewhere, e.g. in a password manager like 1Password or in your Notes app (make sure that you protect the note) for later use in Dive Converter.
Get your Oceanic+ Account ID
Start your Oceanic+ app in which you are still logged in to your Sign in with Apple account.
In the Oceanic+ app go to Settings > Account.
Here you go to the bottom of the page where you see your account ID. Tap on it to copy it to the pasteboard.
Now store also this account ID in your password app or Notes app for later use in Dive Converter.
The Migration
Now we are set to start the migration.
Get your account ID of your old account and the matching refresh token. Also get your email and password for your new Oceanic+ account to which you want to migrate your dives.
Dive Download
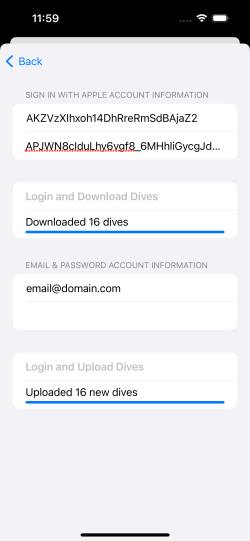
In Dive Converter on your iPhone press the preferences button on the upper left of the screen to open the Dive Converter Information sheet.
Tap on Account Migration.
Now enter your Account ID of your old account ID (or copy it in this field) and enter your Refresh Token.
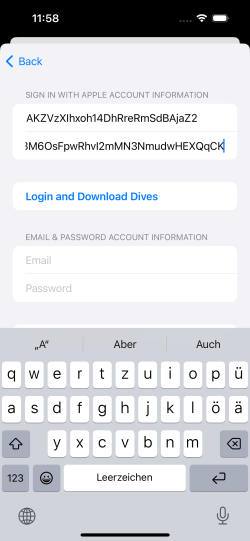
Now press the Login and Download Dives button to log in to your old account that was based on Sign in with Apple and to download your dives from that account. The progress of the login and download will be displayed.
If the operation is successful, Dive Converter will show you the number of downloaded dives.

Dive Upload
After the successful download of your dives from your old account, you can now log in to your new account and upload the previously downloaded dives to it.
Enter the email and password of your new Oceanic+ account and press the Login and Upload Dives button. The pregress of the login and upload will be displayed.
The upload of your dives will take a while. Don’t interrupt it and be patient.
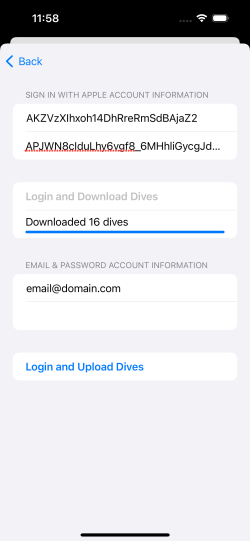
When the upload process is completed, Dive Converter will show the number of uploaded new dives, i.e. if you have performed the migration before and repeat it, it will show zero new dives.
Now you can log in to your new account either in Oceanic+ or in Dive Converter to see the migrated dives.
